Computer Concepts in ActionUnit 6:
DatabasesChange the Format of a ReportThe function of a database is to organize information. You may think that databases are only used by businesses, but they are actually quite common in other situations. You probably used a database today if you made a call on a cellular phone, or looked up a book at your library. In the following exercise you will make changes to an Access database form designed to help plan a party.
To open the data file in Step 1, click on the link. If you are not able to download the file, ask your teacher for help.
- Start Microsoft Access.
- Open the data file
 PartyPlanning
(31.0K)
. If a Security Warning window opens, click the Open button to continue. PartyPlanning
(31.0K)
. If a Security Warning window opens, click the Open button to continue.
- Save the file asYour Name Party Planning. Ask your teacher where you should save your file.
- Click Reports in the Objects shortcut bar on the left.
- Double-click the report Party Planning Report 3 to open it.
- Click the Maximize button to expand Party Planning Report 3.
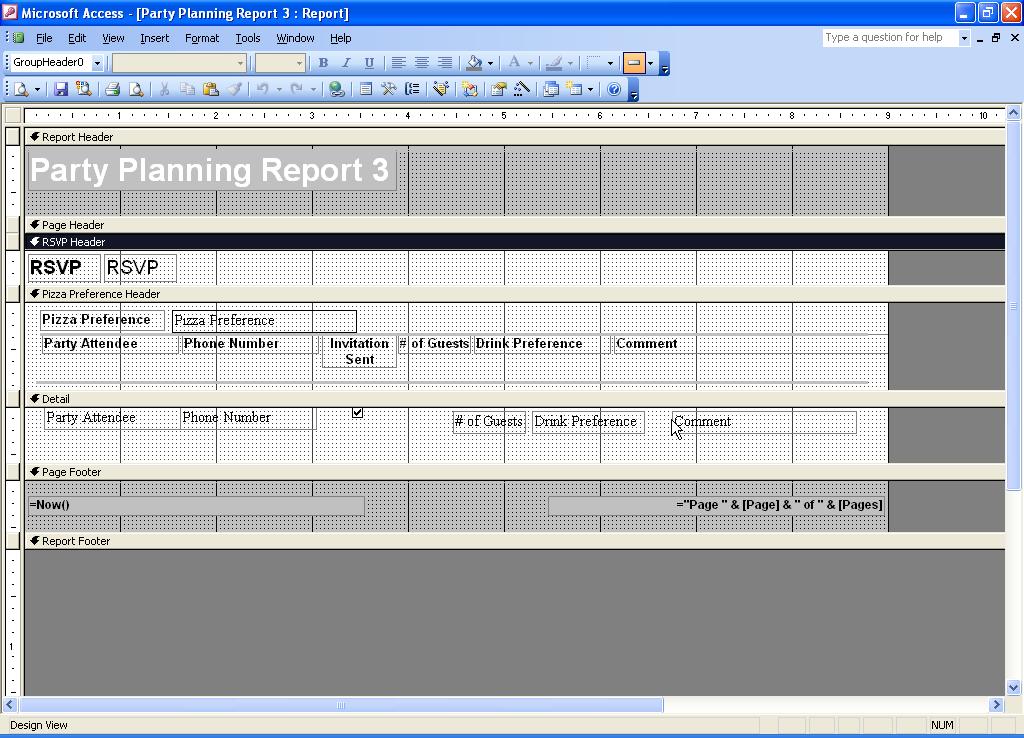
- Click the View button, then click Design View. Your report should look like Figure 1.
- Double-click the Pizza Preference text box in the Pizza Preference Header. Be careful not to click on the Pizza Preference label (see Figure 1).
 <a onClick="window.open('/olcweb/cgi/pluginpop.cgi?it=jpg::::/sites/dl/free/0078612357/271282/EA6_1_01.JPG','popWin', 'width=NaN,height=NaN,resizable,scrollbars');" href="#"><img valign="absmiddle" height="16" width="16" border="0" src="/olcweb/styles/shared/linkicons/image.gif"> (190.0K)</a> <a onClick="window.open('/olcweb/cgi/pluginpop.cgi?it=jpg::::/sites/dl/free/0078612357/271282/EA6_1_01.JPG','popWin', 'width=NaN,height=NaN,resizable,scrollbars');" href="#"><img valign="absmiddle" height="16" width="16" border="0" src="/olcweb/styles/shared/linkicons/image.gif"> (190.0K)</a>
Figure 1 The report in Design View.
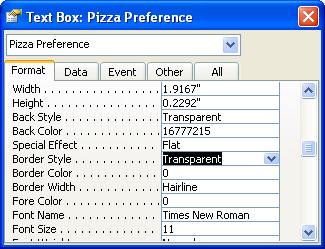
- The Text Box: Pizza Preference window opens. It will look like Figure 2.
- In the Format tab, scroll to Border Style, and click it to display a drop-menu arrow.
- Click the Border Style arrow and click Transparent (See Figure 2). The lines around the Pizza Preference text box turn grey to indicate they will not be seen on the report.
 <a onClick="window.open('/olcweb/cgi/pluginpop.cgi?it=jpg::::/sites/dl/free/0078612357/271282/EA6_1_02.JPG','popWin', 'width=NaN,height=NaN,resizable,scrollbars');" href="#"><img valign="absmiddle" height="16" width="16" border="0" src="/olcweb/styles/shared/linkicons/image.gif"> (27.0K)</a> <a onClick="window.open('/olcweb/cgi/pluginpop.cgi?it=jpg::::/sites/dl/free/0078612357/271282/EA6_1_02.JPG','popWin', 'width=NaN,height=NaN,resizable,scrollbars');" href="#"><img valign="absmiddle" height="16" width="16" border="0" src="/olcweb/styles/shared/linkicons/image.gif"> (27.0K)</a>
Figure 2 Text Box: Pizza Preference window
- Close the Text Box: Pizza Preference window.
- In the Detail section, click and drag the # of Guests text box to the left until it lines up under the # of Guests label (see Figure 3).
 <a onClick="window.open('/olcweb/cgi/pluginpop.cgi?it=jpg::::/sites/dl/free/0078612357/271282/EA6_1_03.JPG','popWin', 'width=NaN,height=NaN,resizable,scrollbars');" href="#"><img valign="absmiddle" height="16" width="16" border="0" src="/olcweb/styles/shared/linkicons/image.gif"> (191.0K)</a> <a onClick="window.open('/olcweb/cgi/pluginpop.cgi?it=jpg::::/sites/dl/free/0078612357/271282/EA6_1_03.JPG','popWin', 'width=NaN,height=NaN,resizable,scrollbars');" href="#"><img valign="absmiddle" height="16" width="16" border="0" src="/olcweb/styles/shared/linkicons/image.gif"> (191.0K)</a>
Figure 3 Align the text box.
- Align the Drink Preference and Comment text boxes under their labels.
- In the Detail section, click the Comment text box.
- On the toolbar, click the arrow on the Font/Fore Color button, then choose Red. The word Comment in the Comment text box turns red.
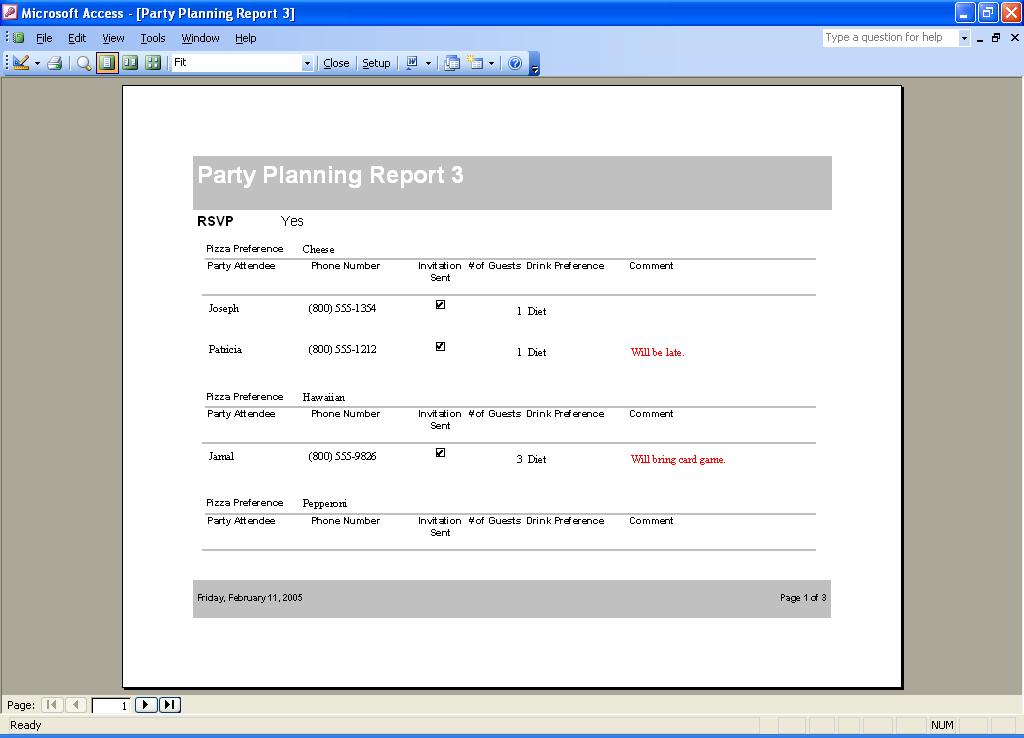
- On the toolbar, click the View button (Hint: It looks like the Print Preview button). Your report should look like Figure 4.
 <a onClick="window.open('/olcweb/cgi/pluginpop.cgi?it=jpg::::/sites/dl/free/0078612357/271282/EA6_1_04.JPG','popWin', 'width=NaN,height=NaN,resizable,scrollbars');" href="#"><img valign="absmiddle" height="16" width="16" border="0" src="/olcweb/styles/shared/linkicons/image.gif"> (74.0K)</a> <a onClick="window.open('/olcweb/cgi/pluginpop.cgi?it=jpg::::/sites/dl/free/0078612357/271282/EA6_1_04.JPG','popWin', 'width=NaN,height=NaN,resizable,scrollbars');" href="#"><img valign="absmiddle" height="16" width="16" border="0" src="/olcweb/styles/shared/linkicons/image.gif"> (74.0K)</a>
Figure 4 The finished report
- Save your report and close your file.
- Exit Access.
 |  |