Computer Concepts in ActionUnit 4:
Word ProcessingUse Reviewing Tools for Working with PartnersUse Reviewing Tools for Working with Partners – Part 1 Insert the Date and Time When you work in a team, you might need to send documents back and forth for
team members to review. Microsoft Word has reviewing tools to make it clear
who is adding changes or comments, and which version is the latest. When a document is going through many revisions it is useful to add the current
date and time to the most recent version. You can use Word to insert this information
into your document in a variety of formats. - Start Microsoft Word.
- Open your Digital Music file and position the insertion point directly under
the title. (Note: If you have not created a Digital Music file in previous activities,
use the
 Digital Music
(24.0K)
data file
and save it as Your Name Digital Music.) Digital Music
(24.0K)
data file
and save it as Your Name Digital Music.) - Click the Insert menu, and then click Date and Time.
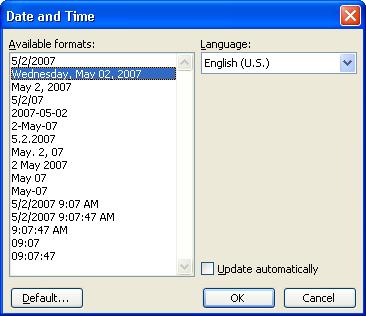
- The Date and Time box opens (see Figure 1). Note the many format options.
 <a onClick="window.open('/olcweb/cgi/pluginpop.cgi?it=jpg::::/sites/dl/free/0078612357/271280/EA4_9_01.JPG','popWin', 'width=NaN,height=NaN,resizable,scrollbars');" href="#"><img valign="absmiddle" height="16" width="16" border="0" src="/olcweb/styles/shared/linkicons/image.gif"> (22.0K)</a> <a onClick="window.open('/olcweb/cgi/pluginpop.cgi?it=jpg::::/sites/dl/free/0078612357/271280/EA4_9_01.JPG','popWin', 'width=NaN,height=NaN,resizable,scrollbars');" href="#"><img valign="absmiddle" height="16" width="16" border="0" src="/olcweb/styles/shared/linkicons/image.gif"> (22.0K)</a>
Figure 1 The Date and Time box
- Select the second date format, then click OK. The current date is automatically
entered into your document (Figure 2).
 <a onClick="window.open('/olcweb/cgi/pluginpop.cgi?it=jpg::::/sites/dl/free/0078612357/271280/EA4_9_02.JPG','popWin', 'width=NaN,height=NaN,resizable,scrollbars');" href="#"><img valign="absmiddle" height="16" width="16" border="0" src="/olcweb/styles/shared/linkicons/image.gif"> (78.0K)</a> <a onClick="window.open('/olcweb/cgi/pluginpop.cgi?it=jpg::::/sites/dl/free/0078612357/271280/EA4_9_02.JPG','popWin', 'width=NaN,height=NaN,resizable,scrollbars');" href="#"><img valign="absmiddle" height="16" width="16" border="0" src="/olcweb/styles/shared/linkicons/image.gif"> (78.0K)</a>
Figure 2 The date appears in your document.
Use Reviewing Tools for Working with Partners – Part 2 Add Comments to a Document Comments are a powerful tool when collaborating on a document with other people. Those who read the document can add comments to the text, and each reviewer’s comments are specifically identified. The comments can be displayed or hidden in the final printed document. Note: It is best to have your screen is in Print Layout View when you use Word’s reviewing tools, such as comments. - In your document, place the insertion point after the word Types. (Note:
If you are not using the Digital Music document, you can place your insertion
point after any word.)
- Click the Insert menu, and then click Comment. The comment box appears in
the right column.
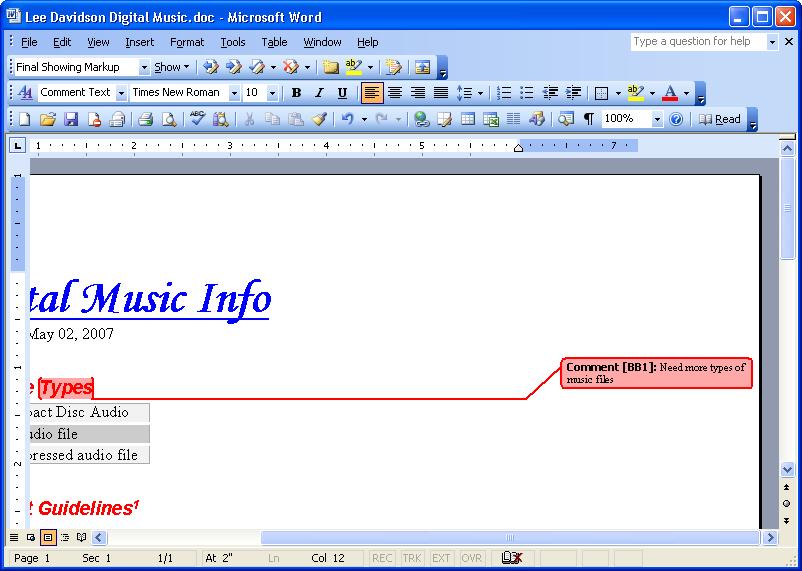
- Type Need more types of music files in the comment (Figure 3).
 <a onClick="window.open('/olcweb/cgi/pluginpop.cgi?it=jpg::::/sites/dl/free/0078612357/271280/EA4_9_03.JPG','popWin', 'width=NaN,height=NaN,resizable,scrollbars');" href="#"><img valign="absmiddle" height="16" width="16" border="0" src="/olcweb/styles/shared/linkicons/image.gif"> (73.0K)</a> <a onClick="window.open('/olcweb/cgi/pluginpop.cgi?it=jpg::::/sites/dl/free/0078612357/271280/EA4_9_03.JPG','popWin', 'width=NaN,height=NaN,resizable,scrollbars');" href="#"><img valign="absmiddle" height="16" width="16" border="0" src="/olcweb/styles/shared/linkicons/image.gif"> (73.0K)</a>
Figure 3 Type a comment.
- Click outside the comment box to return to the regular text.
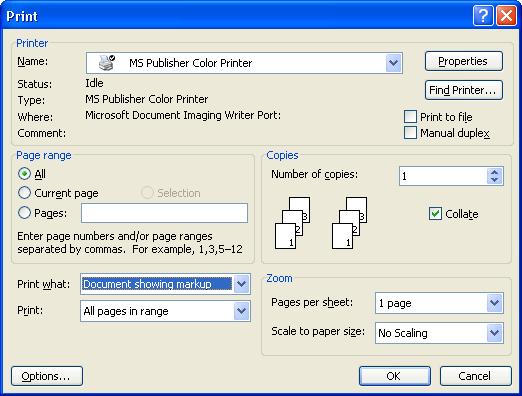
- Click the File menu, and then click Print. The Print box opens.
- In the Print what field, make sure that Document showing markup is selected
(Figure 4). Note: If you want to print the document without showing the comments,
choose Document in that field.
 <a onClick="window.open('/olcweb/cgi/pluginpop.cgi?it=jpg::::/sites/dl/free/0078612357/271280/EA4_9_04.JPG','popWin', 'width=NaN,height=NaN,resizable,scrollbars');" href="#"><img valign="absmiddle" height="16" width="16" border="0" src="/olcweb/styles/shared/linkicons/image.gif"> (43.0K)</a> <a onClick="window.open('/olcweb/cgi/pluginpop.cgi?it=jpg::::/sites/dl/free/0078612357/271280/EA4_9_04.JPG','popWin', 'width=NaN,height=NaN,resizable,scrollbars');" href="#"><img valign="absmiddle" height="16" width="16" border="0" src="/olcweb/styles/shared/linkicons/image.gif"> (43.0K)</a>
Figure 4 Print a document showing markup.
- Click OK. The comments are included on the printout of the document.
Use Reviewing Tools for Working with Partners – Part 3 Track Changes In addition to adding comments, other people can also suggest changes directly
in the document using the Track Changes feature in Word. When Track Changes
is on, Word will automatically show any changes to the document, such as additions,
deletions, and format changes. As with Comments, the time, date, and person
who made the change are identified. Reviewers have the choice of accepting or
rejecting individual changes or all changes. Reviewers can also accept or reject
comments. - Click the View menu, click Toolbars, and choose Reviewing. The Reviewing
toolbar is displayed.
- On the Reviewing toolbar, click the Track Changes button.
- In the Digital Music file, place your insertion point after the word Info.
- Type rmation to complete the word.
- The text is added in a different color and underlined. (Note: The text you
add might be a different color from the text in the figure.)
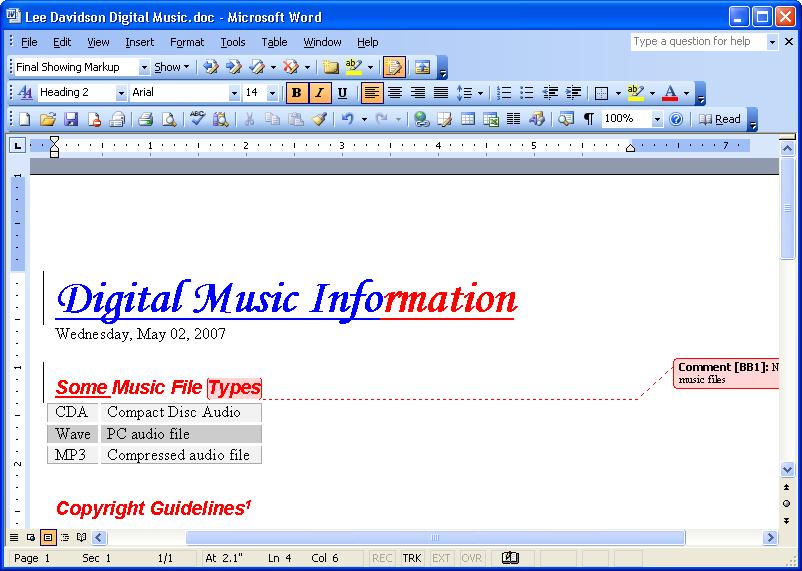
- Before the word Music in Music File Types, type Some (Figure 5).
The colored text is again added and underlined.
 <a onClick="window.open('/olcweb/cgi/pluginpop.cgi?it=jpg::::/sites/dl/free/0078612357/271280/EA4_9_05.JPG','popWin', 'width=NaN,height=NaN,resizable,scrollbars');" href="#"><img valign="absmiddle" height="16" width="16" border="0" src="/olcweb/styles/shared/linkicons/image.gif"> (82.0K)</a> <a onClick="window.open('/olcweb/cgi/pluginpop.cgi?it=jpg::::/sites/dl/free/0078612357/271280/EA4_9_05.JPG','popWin', 'width=NaN,height=NaN,resizable,scrollbars');" href="#"><img valign="absmiddle" height="16" width="16" border="0" src="/olcweb/styles/shared/linkicons/image.gif"> (82.0K)</a>
Figure 5 New text is in a different color and is underlined.
- On the Reviewing toolbar, in the Display for Review drop-down menu, select
Final. The comments and changes will be hidden.
- In the Display for Review menu, select Final Showing Markup. The changes
and comments will reappear.
- On the Reviewing toolbar, click the Next button. Your insertion point should
move to a comment box.
- Click the Reject Change/Delete Comment button to delete the comment.
- Click the Next button again and note how your insertion point moves to the
changes and comments in the document. If asked, click OK to continue searching
from the beginning of the document.
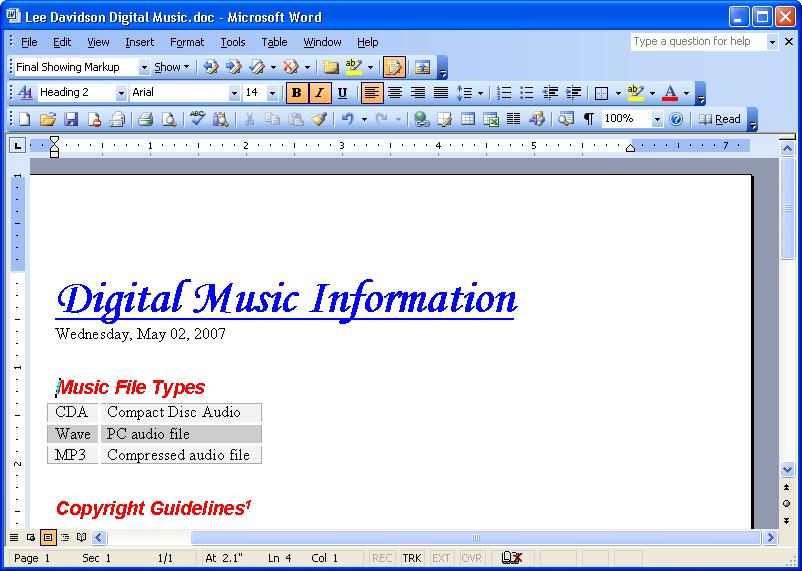
- Click the arrow next to the Accept Change button. Choose Accept All Changes
in Document. The changes are added.
- Your document should look like Figure 6.
 <a onClick="window.open('/olcweb/cgi/pluginpop.cgi?it=jpg::::/sites/dl/free/0078612357/271280/EA4_9_06.JPG','popWin', 'width=NaN,height=NaN,resizable,scrollbars');" href="#"><img valign="absmiddle" height="16" width="16" border="0" src="/olcweb/styles/shared/linkicons/image.gif"> (80.0K)</a> <a onClick="window.open('/olcweb/cgi/pluginpop.cgi?it=jpg::::/sites/dl/free/0078612357/271280/EA4_9_06.JPG','popWin', 'width=NaN,height=NaN,resizable,scrollbars');" href="#"><img valign="absmiddle" height="16" width="16" border="0" src="/olcweb/styles/shared/linkicons/image.gif"> (80.0K)</a>
Figure 6 The final document
- Save and close your file.
- Exit Microsoft Word.
 |  |